Key Takeaways
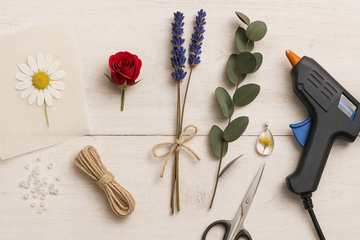
Preserving flowers is a beautiful way to capture fleeting moments and natural beauty. This guide simplifies the process by introducing five proven techniques, helping you choose the best one for your specific needs.
- Capture rustic charm with simple air drying: This traditional, easy method is perfect for sturdy flowers and results in a classic, vintage look ideal for dried bouquets and arrangements.
- Create flat art pieces through careful pressing: Excellent for memorializing delicate blooms, pressing creates flat specimens suitable for framing, scrapbooking, cards, or creating botanical artwork.
- Retain vibrant color and shape using silica gel: For near-perfect preservation of form and hue, silica gel is a superior desiccant, especially effective for delicate or uniquely shaped flowers intended for display or crafts.
- Keep flowers pliable with glycerin preservation: Glycerin replaces water within the plant's tissue, resulting in flexible, natural-feeling flowers that are wonderful for flexible displays and arrangements.
- Craft durable keepsakes by embedding in resin: For a permanent, clear encapsulation suitable for jewelry, paperweights, or other robust crafts, embedding flowers in resin is the ultimate long-term solution.
- Base your method choice on your project's end goal: The most effective preservation technique depends entirely on what you plan to do with the preserved flowers – align the method with your desired outcome (e.g., display, art, jewelry).
- Achieve best results by starting with fresh blooms: For any preservation method, the key to success is beginning with flowers that are fresh, dry (no surface moisture), and ideally just past peak bloom.
Understanding these core preservation methods and their ideal applications empowers you to confidently select the right technique for any floral project. Now, let's explore each of these five techniques in detail, providing step-by-step instructions to help you preserve your cherished flowers successfully.
Introduction
Few things are more heartbreaking than watching a fresh bouquet wilt within days. Ever asked yourself, how are flowers preserved so they stay vibrant and beautiful for years? Mastering the art of flower preservation lets you capture those fleeting moments—turning petals into lasting keepsakes.
From rustic air drying and delicate pressing to silica gel drying, glycerin infusion, and resin embedding, these flower preservation methods suit every project. You’ll get clear, step-by-step flower drying techniques, detailed material lists, realistic timelines, and insider tips to retain color, shape, and texture—whether you’re creating framed botanical art, flexible arrangements, or permanent jewelry.
Let’s explore how to preserve flowers using these five proven methods and choose the best approach for your next floral project.
Flower Preservation Methods: Selecting the Right Technique
Aligning Your Project Goals with Preservation Techniques
Ever wondered how are flowers preserved to last for months or even years? Choosing the right method depends on your creative vision and final application. Use this mini-framework to match your project goals with the ideal preservation technique:
• Rustic wreaths, potpourri, large bouquets: Air Drying
• Framed art, scrapbooking, greeting cards: Pressing
• Three-dimensional displays, shadow boxes, high-fidelity arrangements: Silica Gel Drying
• Flexible garlands, wreaths, tactile décor: Glycerin Infusion
• Jewelry, coasters, paperweights: Resin Embedding
Starting with Fresh Blooms: Key Preparations for Success
- Choose fresh, just-opened blooms, harvested in the morning after dew has evaporated.
- Remove excess foliage and any damaged petals to prevent mold.
- Recut stems at a 45° angle under water to improve uptake of preservatives.
- Work in a cool, dry space away from direct sunlight and drafts.
- Label your flowers by variety and date to track results accurately.
Air Drying Flowers: A Classic Flower Drying Technique
Ideal Flowers for Air Drying
• Statice
• Strawflower
• Lavender
• Baby’s Breath
• Yarrow
• Small hydrangea clusters
Materials and Setup for Air Drying
• Twine or florist’s wire
• Rubber bands or string
• Sturdy hooks or clothes hangers
• Dark, well-ventilated room
• Dehumidifier or fan (in humid climates)
Step-by-Step Air Drying Process
- Bundle 5–10 stems, aligning the cut ends.
- Secure stems with a rubber band, allowing space for shrinkage.
- Hang bundles upside down from hooks, spacing them 2–3 inches apart.
- Maintain 50–60% relative humidity and 65–75°F (18–24°C).
- Leave undisturbed for 1–3 weeks, checking every 3–4 days for mold or brittleness.
Timeline and Tips: How Long Does It Take to Air Dry Flowers?
Most blooms finish drying in 7–21 days. Thicker petals (e.g., hydrangeas) take longer, while delicate sprigs (e.g., lavender) can dry in under a week. Avoid direct sunlight to preserve color—excess heat can bleach petals gray.
Crafting Rustic Bouquets and Vintage Arrangements
Air-dried blooms bring natural charm to:
• Mason jar centerpieces tied with burlap and lace
• Wreaths accented with cinnamon sticks and pinecones
• Vintage frames filled with pressed grasses and statice
• Hanging installations above a farmhouse-style table
Pressing Flowers: Creating Flat Botanical Art
Best Flowers for Pressing
• Pansies and violas
• Ferns and delicate leaves
• Daisies and chamomile
• Cosmos and simple blooms with flat petals
Materials and Tools for Pressing Flowers
• Commercial flower press or two heavy books
• Blotting paper or parchment paper
• Corrugated cardboard for airflow
• Silicone sheets (optional for UV pressing)
Step-by-Step Pressing Flowers Technique
- Arrange single petals or whole small flowers between blotting paper.
- Alternate layers of paper and cardboard to create a stack.
- Tighten the press or weigh down books evenly.
- After 7–10 days, swap damp paper to fresh sheets.
- Continue pressing until petals are dry and papery to the touch.
Creative Applications: Framing, Scrapbooking, Cards
• Handmade greeting cards with pressed petals sealed under wax
• Framed botanical art as wall décor or wedding gifts
• DIY bookmarks layered with dried florals and resin sealant
• Scrapbook embellishments capturing seasonal memories
Troubleshooting Common Pressing Issues
• Petals curling? Increase paper changes and reduce pressure.
• Discoloration or sticking? Insert non-stick parchment between petals and blotting sheets.
• Slow drying? Add extra cardboard layers for airflow.
Silica Gel Drying: Retaining Vibrant Color and Shape
Why Choose Silica Gel Drying
Silica gel desiccant absorbs moisture quickly, preserving three-dimensional form and vibrant hues in just days—perfect for high-fidelity displays and resin projects.
Which Flowers Work Best with Silica Gel Drying?
• Roses and peonies
• Zinnias and dahlias
• Daisies and small chrysanthemums
• Orchids and tiny carnations
Materials, Types of Silica Gel and Safety Precautions
• Coarse vs. fine silica gel beads (fine for small blooms)
• Airtight plastic or glass container
• Protective gloves, dust mask, and goggles to prevent inhalation
• Mesh rack (optional for full bouquets)
Step-by-Step Guide to Dry Flowers with Silica Gel
- Pour a 1–2" layer of dry silica gel into your container.
- Place flowers upright, petal-side up, on the gel bed.
- Gently cover blooms with more gel until fully submerged.
- Seal the container and store in a cool, dry spot for 2–7 days.
- Carefully unearth flowers, brushing off excess beads.
Tips for Preserving Hue and Petal Integrity
• Chill flowers in the refrigerator for a few hours before drying.
• Replace gel between large batches to maintain desiccant efficacy.
• Work gently to avoid crushing delicate petals.
Glycerin Infusion Preservation: Flexible, Natural-Feeling Blooms
What Is Glycerin Infusion and How It Works
Glycerin, a hygroscopic molecule, replaces water in plant cells, keeping petals supple and pliable—ideal for garlands and flexible décor.
Best Flowers for Glycerin Preservation
• Eucalyptus and birch leaves
• Hydrangeas and roses
• Fern fronds and tropical foliage
• Seed pods and grasses
Materials and Solution Preparation
• Food-grade glycerin (90% purity)
• Warm water (around 100°F/38°C)
• Clear glass vase or container
• Rocks or weights to keep stems submerged
Step-by-Step Glycerin Infusion Process
- Mix two parts warm water with one part glycerin until dissolved.
- Trim stems at a 45° angle and strip lower leaves.
- Submerge stems completely in the solution, adding weight if needed.
- Store in a dark, cool area for 1–2 weeks.
- When petals feel leathery, remove and gently shake off excess liquid.
Caring for Glycerin-Preserved Flowers
• Display in dry environments away from direct sunlight.
• Dust lightly with a soft brush; avoid water-based sprays.
• Rotate arrangements periodically to maintain shape.
Resin Embedding for Crafts: Durable Clear Encapsulation
Introduction to Resin Embedding for Keepsakes
Resin embedding locks preserved flowers in crystal-clear epoxy, creating durable jewelry, coasters, and decorative art that lasts a lifetime.
Choosing Flowers for Resin Jewelry and Paperweights
• Use fully dried blooms (air- or silica-gel-dried).
• Select small to medium blossoms no thicker than ¼" for even curing.
• Trim stems flush with petals for a seamless embed.
Materials, Resin Types, and Workspace Safety
• Epoxy resin or UV-curing resin kit
• Silicone molds (pendant, coaster, paperweight shapes)
• Measuring cups, stir sticks, and toothpicks
• Nitrile gloves, respirator mask, and safety goggles
• Well-ventilated workspace or fume hood
Step-by-Step How to Preserve Flowers in Resin Tutorial
- Preheat resin and molds to 75°F (24°C) for better flow.
- Mix resin and hardener at manufacturer’s recommended ratio, stirring slowly.
- Pour a thin base layer into the mold; let it settle for 5–10 minutes to release bubbles.
- Position flowers with tweezers, gently pressing petals flat.
- Top with remaining resin, ensuring flowers are fully encapsulated.
- Use a heat gun or small torch to pop surface bubbles.
Curing Times, Safety Considerations, and Finishing Touches
• Typical epoxy cure: 24–48 hours; UV resin: 5–30 minutes under a UV lamp.
• Always follow manufacturer’s safety guidelines—resin fumes can be harmful.
• Demold and sand edges smooth; polish with a soft cloth for a crystal finish.
Comparing Flower Preservation Methods
Pros and Cons of Each Technique
Air Drying
- Low cost and hands-off
– Colors fade; petals can become brittle
Pressing - Minimal tools; great for flat art
– Blooms lose 3D shape; risk of sticking
Silica Gel Drying - Excellent color and form retention
– Higher material cost; silica dust hazard
Glycerin Infusion - Flexible, life-like texture
– Alters color tone; longer processing time
Resin Embedding - Durable, versatile keepsakes
– Requires precision, safety gear, and skill
Matching Methods to Your Desired Outcome (Display, Art, Jewelry)
• Rustic décor and potpourri: Air Drying
• Stationery and framed art: Pressing
• Bouquet displays and shadow boxes: Silica Gel Drying
• Flexible wreaths and garlands: Glycerin Infusion
• Jewelry, coasters, paperweights: Resin Embedding
Time, Cost, and Skill Level Considerations
• Air Drying: 1–3 weeks; $; Beginner
• Pressing: 7–10 days; $; Beginner
• Silica Gel: 2–7 days; $$; Intermediate
• Glycerin Infusion: 1–2 weeks; $$; Intermediate
• Resin Embedding: 1–2 days (+ prep); $$$; Advanced
Use this comprehensive guide to ensure your blooms go from fresh cut to treasured keepsake with confidence and creativity.
Conclusion
By matching preservation methods to your creative objectives—whether rustic air-dried arrangements or high-fidelity resin keepsakes—you can transform fresh blooms into lasting treasures. Starting with well-prepared, just-opened flowers ensures optimal results across air drying, pressing, silica gel, glycerin infusion, and resin embedding. Each technique balances cost, time, and skill level, offering versatility from beginner-friendly pressing to advanced resin encapsulation. Understanding these approaches and their pros and cons empowers you to choose the perfect solution for décor, art, jewelry, or sentimental gifts. Embrace experimentation, refine your process, and watch your floral creations endure beyond their natural lifespan. Which preservation method will you explore next to capture your favorite blossoms in timeless form?
Frequently Asked Questions (FAQ)
Q: How long does it take to air dry flowers?
A: Most blooms finish drying in 7–21 days. Thicker-petaled flowers like hydrangeas take closer to three weeks, while delicate sprigs such as lavender can dry in under a week. Avoid direct sunlight to preserve color.
Q: Which flowers work best with silica gel drying?
A: Silica gel drying is ideal for roses and peonies, zinnias and dahlias, daisies and small chrysanthemums, and orchids and tiny carnations.
Q: How do you embed preserved flowers in resin?
A: Preheat resin and molds to about 75°F (24°C). Mix resin and hardener per the manufacturer’s ratio, pour a thin base layer, then position fully dried flowers with tweezers. Top with remaining resin, use a heat gun or torch to remove bubbles, and let cure—24–48 hours for epoxy or 5–30 minutes under UV light.
Q: What key preparations are needed before preserving flowers?
A: Choose fresh, just-opened blooms harvested after morning dew; remove excess foliage and damaged petals; recut stems at a 45° angle under water; work in a cool, dry space away from sunlight and drafts; and label flowers by variety and date.
Q: What materials do you need to air dry flowers at home?
A: You’ll need twine or florist’s wire; rubber bands or string; sturdy hooks or clothes hangers; a dark, well-ventilated room; and, in humid climates, a dehumidifier or fan.
Q: What is glycerin infusion and how does it preserve flowers?
A: Glycerin infusion uses glycerin—a hygroscopic molecule—to replace water in plant cells, keeping petals and foliage supple and pliable, ideal for flexible garlands and tactile décor.
Q: Which flowers work best with glycerin infusion preservation?
A: Glycerin infusion works well with eucalyptus and birch leaves, hydrangeas and roses, fern fronds and tropical foliage, as well as seed pods and grasses.


