Key Takeaways
Creating a DIY terrarium blends creativity, science, and budget-savvy planning to transform a simple glass container into a thriving miniature ecosystem. Our guide walks you through essential terrarium types, materials, assembly steps, styling tips, and maintenance practices—enhanced by transparent cost breakdowns and curated supplier recommendations to help you build your perfect green oasis without guessing on expenses.
- Select the ideal terrarium type for your project: Decide between open vs closed and succulent vs tropical setups based on ambient humidity, care commitment, and desired DIY aesthetic.
- Plan your budget with transparent cost estimates: Itemize expenses for containers, substrates, plants, and tools, supplemented by vetted supplier links to support informed purchase decisions.
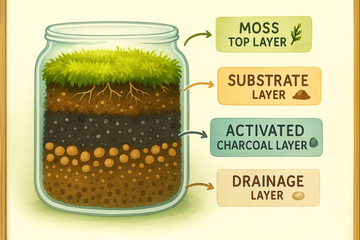
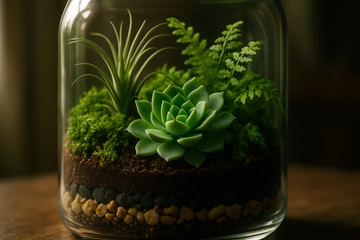
- Layer substrates for optimal growth: Build a healthy foundation with drainage pebbles, activated charcoal to filter impurities, and nutrient-rich terrarium soil tailored to your plant selection.
- Choose plants by humidity requirements: Match low-maintenance succulents (perfect for a DIY succulent terrarium) or moisture-loving ferns and tropicals to closed ecosystems, ensuring long-term vitality.
- Elevate aesthetics with styling accents: Add decorative gravel, live moss layers, natural driftwood, or miniature ornaments to personalize your DIY glass terrarium and amplify visual appeal.
- Source quality materials from trusted suppliers: Leverage our curated links for glass terrarium containers, organic substrates, and specialty plants to secure reliable products and timely delivery.
- Simplify maintenance with a tailored care routine: Establish a watering schedule, monitor light exposure, and regulate humidity to prevent overwatering and promote healthy growth.
- Advance your DIY skills through experimentation: Explore closed vs open systems, integrate air plants or rare specimens, and refine layering techniques as you gain confidence.
With these key insights, you're equipped to embark on your terrarium-building journey—combining clear budgeting, expert layering techniques, and creative styling to cultivate a lasting indoor green sanctuary. Let’s dive into the detailed 10-step process that will guide you from material selection to ongoing care.
Introduction
Imagine transforming an ordinary glass container into a lush, miniature universe that thrives right on your windowsill. Creating a DIY terrarium is not only a delightful project that sparks your creativity, but it also offers a rewarding way to incorporate nature into your home, regardless of your space constraints.
Building your perfect green oasis isn’t just about aesthetics; it combines principles of botany and design, all while being budget-friendly. In this comprehensive guide, you'll learn to choose the ideal terrarium type, source your materials smartly, and master layering techniques—all supported by clear cost estimates and supplier recommendations to make your journey seamless.
Let’s dive into the 10 easy steps that will help you craft, style, and maintain a thriving DIY terrarium that reflects your unique taste and brings a touch of nature indoors.
Ever dreamed of a self-contained garden you can admire on your desk? This step-by-step guide to making a DIY terrarium covers everything from selecting the perfect open or closed system to advanced styling and troubleshooting. Whether you’re into succulents or crave a lush tropical vibe, you’ll find transparent cost breakdowns, vetted supplier recommendations, and expert tips to build a healthy, eye-catching display.
Step 1: Select Your DIY Terrarium Type: Open vs Closed & Succulent vs Tropical
Open vs Closed Terrariums
Open terrariums (DIY succulent terrarium style) feature an exposed top, allowing air to circulate freely.
- Humidity & Care: 40–60% relative humidity; water every 2–3 weeks.
- Pros: Ideal for cacti and succulents; less risk of mold; easy to access.
- Cons: Dries out faster; more frequent watering.
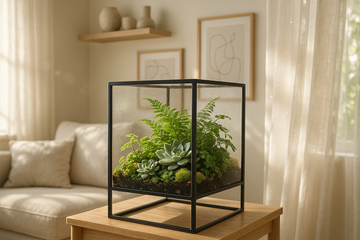
- Aesthetic Impact: Clean, modern look—great for geometric glass bowls or wall-mounted displays.
Closed terrariums (DIY closed terrarium) have a sealed lid, creating a mini greenhouse.
- Humidity & Care: 70–90% relative humidity (UC Davis Master Gardener Program); water every 4–6 weeks.
- Pros: Self-sustaining moisture cycle; perfect for tropical plants and moss.
- Cons: Can develop mold if overwatered; limited to humidity-loving species.
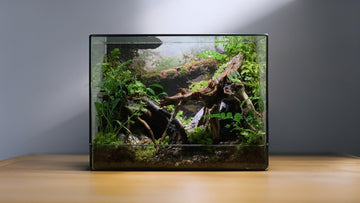
- Aesthetic Impact: Lush, jungle-like vibe—ideal for vintage apothecary jars or bell jars.
Succulent vs Tropical Setups
Not sure which style suits your space and schedule? Compare these:
| Feature | Succulent Terrarium | Tropical Terrarium ||-----------------------|--------------------------------------|------------------------------------|| Humidity | Low (40–60%) | High (70–90%) || Watering Frequency | Every 2–3 weeks | Every 4–6 weeks || Substrate Blend | Fast-draining (sand, perlite mix) | Moisture-retentive (peat, bark mix)|| Visual Style | Sparse, minimalist, architectural | Dense, layered, forest-like || Maintenance Trade-Off | Low (drought-tolerant plants) | Moderate (watch for condensation) |
Once you’ve picked open vs closed and succulent vs tropical, move on to budgeting.
Step 2: Plan Your Budget: How Much Does It Cost to Build a DIY Terrarium?
Transparent Cost Estimates for Every Component
As of 2025 U.S. averages (Home Depot, Amazon, The Sill):
- Glass container: $12–$35
- Drainage pebbles (1 lb): $4–$10
- Activated charcoal (4 oz): $6–$14
- Terrarium substrate (2 qt): $8–$18
- Plants (each): $4–$20
- Tools & accessories (set): $12–$30
Sample total: $46–$127 for a 1–2 gal terrarium.
Curated Supplier Recommendations & Sample Budget Breakdown
Trusted vendors for quality, eco-friendly supplies:
• The Sill (https://www.thesill.com/collections/terrariums)
– Pros: Sustainably sourced plants, complete glass terrarium kits.
– Cons: Premium pricing; shipping varies by region.
• Terrain (https://www.shopterrain.com/collections/terrariums)
– Pros: Organic substrates, unique glass shapes, seasonal decor.
– Cons: Higher-end styles may exceed budget.
• Amazon Basics & Lechuza (https://www.amazon.com)
– Pros: Wide range of containers and accessories; budget-friendly.
– Cons: Quality can vary; read reviews carefully.
Sample budgets:
- Basic open succulent terrarium: $46–$70
- Mid-range closed tropical terrarium (with decor): $70–$100
- Premium kit (rare specimens, custom glass): $100–$150
With your budget and suppliers lined up, gather everything you need in Step 3.
Step 3: Gather Essential Materials and Tools: A Step-by-Step Guide to Making a Terrarium
Choosing the Right Glass Container (DIY glass terrarium)
- Size & Shape: Ensure at least 1 " clearance above your tallest plant.
- Opening: Wide-mouth for easy planting; narrow-necked jars for decorative challenge.
- Safety: Opt for tempered glass on containers larger than 3 gal for shatter resistance.
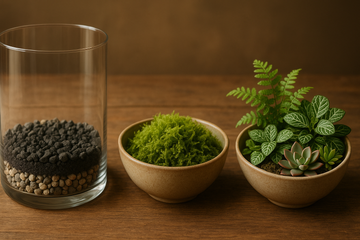
Terrarium Substrate Components
- Drainage Pebbles: 1–2 " layer to keep roots from sitting in water (experienced makers recommend).
- Activated Charcoal: Adsorbs impurities and odors; replace every 6–12 months.
- Terrarium Soil: Custom blends—see Step 5.
Tools & Accessories
- Long tweezers or tongs for precise placement
- Small funnel or rolled paper to pour substrate
- Spray bottle for gentle misting
- Gardening gloves and scissors for pruning
- Soft brush to tidy glass edges
Ready? Let’s build a solid base in Step 4.
Step 4: Create the Drainage Layer with Pebbles and Activated Charcoal
Layering Drainage Pebbles
- Add a 1–2 " layer of clean pebbles or aquarium gravel.
- Mix small and large stones for air pockets.
- In tight-neck containers, place a piece of mesh fabric to keep layers separate.
Adding Activated Charcoal
- Sprinkle a ¼ " layer of horticultural charcoal over the pebbles.
- Lightly mist to settle and activate adsorption.
- Replace charcoal every 6–12 months to maintain filtration.
Now that your drainage is sorted, let’s add nutrient-rich soil in Step 5.
Step 5: Add the Substrate Layer: Nutrient-Rich Terrarium Soil
Mixing and Leveling the Soil
- Succulent Mix: 3 parts potting soil, 1 part coarse sand, 1 part perlite.
- Tropical Mix: 2 parts peat moss, 1 part perlite, 1 part potting soil, plus orchid bark for aeration.
- For extra depth, see “Complete Guide to Terrarium Substrates” on GardenersHQ.com.
Ensuring Proper Soil Depth
- Succulent Terrariums: 1–2 " to encourage drainage.
- Tropical Terrariums: 3–4 " for robust root systems.
- Slope soil higher at the back for a natural look; tap gently to remove air pockets.
With soil in place, it’s planting time—onto Step 6.
Step 6: Select and Place Plants Based on Humidity Requirements
Best Low-Maintenance Plants for a Closed Terrarium
- Ferns: Nephrolepis exaltata (Boston fern), Asplenium nidus (bird’s-nest fern)
- Mosses: Sheet moss, cushion moss for carpets
- Tropical Foliage: Fittonia, Pilea depressa, small Calathea varieties
Case Study: Mark’s Mini Jungle
Mark built a 1 gal closed terrarium with Fittonia, baby tears, and moss for $60. He achieved balanced humidity by placing it near an east-facing window and misting monthly.
Succulents and Cacti for Open Terrariums
- Haworthia attenuata, Echeveria elegans, Sedum morganianum
- Crassula ovata (small jade) and small agave pups
Strategic Plant Arrangement
- Place the largest “focal” plant toward the back or center.
- Group smaller species in clusters of 3–5 for visual harmony.
- Leave at least ½ " between foliage and glass to prevent rot.
Pro Tip: Jostle plants gently to settle roots; avoid overpacking your terrarium.
Once your greenery is set, elevate the look with accents in Step 7.
Step 7: Elevate Aesthetics with Styling Accents
Decorative Gravel and Live Moss Layers
- Colored Gravel Bands: Use a small funnel to layer white, black, or colored sands for a graphic effect.
- Live Moss Carpets: Press sheet moss onto soil; mist lightly to establish a lush green carpet.
Incorporating Driftwood, Stones, and Miniature Ornaments
- Choose odd-numbered groupings (3 or 5 pieces) for balance.
- Mix textures—smooth pebbles against rough bark.
- Add tiny figurines or seasonal accents (pinecones in winter, acorns in fall).
Next up: first watering and getting your light just right in Step 8.
Step 8: Perform the First Watering and Initial Care
Watering Techniques and Frequency
- Open Terrariums: Water sparingly every 2–3 weeks—let substrate dry out between watering.
- Closed Terrariums: Water every 4–6 weeks; aim for light condensation on glass, not constant drips.
Light Placement and Humidity Control
- Succulents: Bright, indirect light or 2–4 hours of morning sun; avoid scorching midday rays.
- Tropical Plants: Bright, filtered light; consider LED grow lights (5000–6500 K) if natural light is limited.
- Tip: Use a small hygrometer stuck inside to monitor humidity levels.
Step 9: Implement Ongoing Maintenance and Troubleshooting
Regular Care Routine and Monitoring
- Monthly: Remove dead foliage, wipe glass interior, rotate for even light.
- Quarterly: Check soil depth and charcoal layer; refresh soil or charcoal as needed.
Troubleshooting Common Terrarium Issues
- Mold & Algae: Open lid for a few hours daily or reduce watering.
- Pests (Fungus Gnats): Top-dress with fine horticultural sand; use yellow sticky traps.
- Leggy Growth: Increase light intensity or prune back overgrown stems.
- Regional Tip: In arid climates, mist lightly more often; in humid regions, crack the lid open weekly.
Vignette: When Sara’s closed terrarium fogged over completely, she removed the lid for an hour every morning and trimmed overcrowded leaves—restoring balance in two weeks.
Step 10: Experiment and Advance Your DIY Skills
Exploring Open vs Closed System Variations
- Air Plants & Epiphytes: Mount Tillandsia on driftwood in open terrariums for sculptural appeal.
- Rare Specimens: Try carnivorous plants (Venus flytrap, sundews) in high-humidity sections of closed setups.
Refining Layering Techniques and Creative Themes
- Biome Scenes: Create a desert scene with colored sands, mini cacti, and crushed granite.
- Aquatic Touch: Include a shallow pool of water or miniature water feature in larger containers.
Expert Tips and Next-Level Inspirations
- Thermal Mass: Add small rocks that absorb heat by day and release it at night, stabilizing microclimate.
- Self-Sustaining Ecosystem: Introduce springtails and isopods to help decompose debris and control mold.
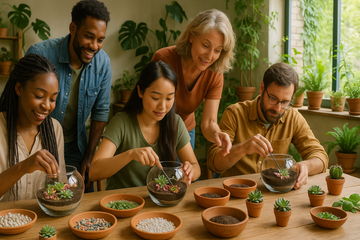
- Design Challenge: Host a “terrarium swap” with friends—compare styles, swap rare plants, and share tips.
By following these ten steps—from type selection and budgeting to advanced experiments—you’ll master the art of crafting vibrant, long-lasting DIY terrariums that delight the eye and enrich your indoor gardening journey. Happy planting!
Conclusion
Creating a DIY terrarium is an engaging and rewarding endeavor that allows you to bring a unique touch of nature into your home or workspace. As outlined in the guide, understanding the differences between open and closed systems, as well as succulent and tropical plants, is crucial for crafting an environment that thrives. The detailed cost estimates and supplier recommendations provide a transparent pathway, ensuring you can budget effectively while utilizing quality resources.
Moreover, regular maintenance routines and troubleshooting tips empower you to sustain your terrarium's health and aesthetic, creating a self-sufficient ecosystem that can adapt to your surroundings. As you venture into experimenting with layering techniques and creative themes, remember that the joy of terrarium-making lies in its endless possibilities for personalization and growth. Will you explore new plant varieties or innovative designs on your next crafting journey? The decision is yours, and with the right knowledge and materials, the journey to a beautiful DIY terrarium can begin today.
Frequently Asked Questions (FAQ)
Q: What is the difference between open and closed terrariums?
A: Open terrariums have an exposed top, maintain 40–60% relative humidity, and dry out faster, making them ideal for cacti and succulents with a clean, modern look and minimal mold risk. Closed terrariums are sealed to hold 70–90% humidity, creating a self-sustaining mini greenhouse perfect for tropical plants and moss, but they can develop mold if overwatered and suit only humidity-loving species.
Q: How often should I water my terrarium?
A: For open terrariums, water every 2–3 weeks, allowing the substrate to dry between waterings. Closed terrariums require watering every 4–6 weeks, aiming for light condensation on the glass rather than constant drips.
Q: What plants are best for a DIY terrarium?
A: Closed terrariums suit humidity-loving plants like Boston fern, bird’s-nest fern, sheet and cushion moss, Fittonia, Pilea depressa, and small Calathea. Open terrariums work well with succulents and cacti such as Haworthia attenuata, Echeveria elegans, Sedum morganianum, Crassula ovata, and small agave pups.
Q: How much does it cost to build a DIY terrarium?
A: A 1–2 gallon terrarium typically costs $46–$127, including $12–$35 for a glass container, $4–$10 for drainage pebbles, $6–$14 for activated charcoal, $8–$18 for terrarium substrate, $4–$20 per plant, and $12–$30 for tools and accessories.
Q: What essential materials and tools do I need for making a terrarium?
A: You need a glass container (with at least 1" clearance above plants and tempered glass if over 3 gal); drainage pebbles; activated charcoal; terrarium soil; suitable plants; long tweezers or tongs; a small funnel or rolled paper; a spray bottle; gardening gloves; scissors; and a soft brush.
Q: How do I create a proper drainage layer in my terrarium?
A: Start by adding a 1–2" layer of clean pebbles or aquarium gravel, mixing small and large stones and using mesh fabric in narrow-neck containers. Then add a ¼" layer of activated charcoal, mist lightly to settle it, and replace the charcoal every 6–12 months.
Q: What ongoing maintenance does a terrarium require?
A: Monthly, remove dead foliage, wipe the glass interior, and rotate the terrarium for even light exposure. Quarterly, check soil depth and the charcoal layer, refreshing soil or charcoal as needed to maintain a healthy environment.
Q: How do I troubleshoot common terrarium issues like mold, pests, or leggy growth?
A: For mold or algae, open the lid for a few hours daily or reduce watering. To control fungus gnats, top-dress with fine horticultural sand and use yellow sticky traps. If plants grow leggy, increase light intensity or prune back overgrown stems.


